Hello all! I am happy to report that we are lice free and because of this first time experience with lice, I decided to put together a post called “Everything you need to know about lice for the first time mom”. I learned so much with this experience and knew very little when we got the notice from school, so I thought I would put all this info out there in hopes that it will help someone. Look for it in the next few days.
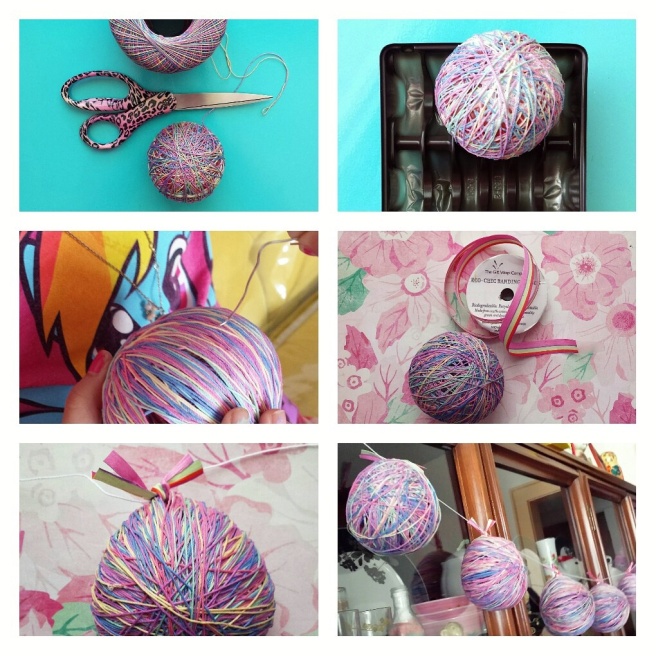
On to crafting…We made several things out of thread and yarn for this year’s Easter crafting. The first were these thread ball banners. I strung them up in the dining room, put tiny LED lights in them and they are quite lovely. Here is the how to:
Tools and supplies
1. Water balloons
2. Colorful crochet thread or string of your choice yarn, twine etc.
3. White glue and water 1:1 ratio. I decided to try out this Mod Podge stiffy for the first time. The Midwest is humid in spring/summer and I would like these to retain their shape. They were really solid!
4. Brushes for spreading glue.
5. Sharp object for popping balloons- we used a paper clip.
6. Scissors for snipping.
7. Plastic tray or yogurt containers for drying time.
8. Pretty ribbon for making a little bow
9. Crochet thread, twine, string of your choice for hanging.
The how to:
1. Blow up your balloons and tie them.
2. Add your glue to a bowl for dipping. This part can go two ways, you can either 1. Place your thread into the glue bowl and wrap wet thread onto your balloons OR 2. You can wrap your balloons with dry thread and paint your glue on with a brush or sponge. I did the latter because I tend to get tangles when I dump my string into the glue bowl, especially when working with a fine thread. Either way, it will be messy lol. I recommend starting the first layers of wrapping for your child because the thread can slide around quite a bit in the beginning and it could become frustrating for small hands. Working with a thicker tread or yarn is easier. I will post our yarn nests tomorrow.
3. Once you are all done wrapping, place your wrapped balloon on your container of choice to dry.
3. Once your balloon is dry. (We dried ours overnight.) Take a sharp object and pop each balloon! That was super fun!
4. Take your decorative ribbon and tie a bow onto the top of your ball or you can hot glue one on.
5. Using a yarn needle we treaded our white hanging thread through each bow and added a drop if glue in the middle so that they will stay in place. Once dry we hung them up! I put mini LED lights in them and they look so beautiful in the evening!
I hope you enjoyed this craft!


