Do you want to build a snowman….

La la la la la la la. Ah Frozen. We had the most spectacular snowfall here in the Midwest, followed by some moisture, which makes the perfect combination of weather for snowman building. The moisture makes the snow pack nicely. Because everything was buried,

it was a challenge to find sticks and rocks so we used some rocks from our terrarium making for the eyes and a few sticks were found for twig hair and arms. We had a neglected carrot in the refrigerator for the nose. But what about the mouth? Mom to the rescue! I wrapped some wire with colorful yarn. Bent the ends so they could be placed right into the snowman’s face and voila! It was the perfect smile!

image

image
Isn't he the cutest!

Happy winter! Hope you enjoyed our cheerful, colorful smile.

Sticky Mosaics

image

This is a wonderful crafting gift my 6 year old enjoyed. She was so engaged in the project and completed the whole image in one sitting. It isn’t something I would normally gravitate to design wise, so I am happy she received it as a gift.

This kit came with 4 boards that look like this:

image

Each square has a number printed on it. The numbers have corresponding colors that must be identified and then placed. They are foam stickers and look like this:

image

There is so much learning happening in this craft! Fine motor skills, number identification, color identification, patience. I absolutely love it.

Here is my daughter’s finished piece:

image

Also included in the box were ways to display the finished mosaic which is so mindful of the company. There is a stand or of you prefer a plastic stick-on eyelet for hanging:

image

The fact that she really loved it makes it worth getting again AND purchasing as a gift for others. I hope you enjoyed the review!

The best present is your presence

I found these lovely Thank You cards at Target. Aren’t they adorable? Normally we would craft our own, but we had a large number of guests at our birthday party so I went ahead and bought them.

image

We put a few stickers in each envelope and sent them on their way.

image

I love being able to show others gratitude with my child. It felt good to watch my daughter thoughtfully pick stickers for each guest, being mindful of favorite colors and the likes of each individual. It was fun to put these together with her.

Cereal Box sun catcher hearts ♡

image

One morning I was inspired while going through my “do not throw out” recycling bag of stuff. I had multiple cereal boxes and this little idea popped into my head. They turned out beautifully and I am so happy to share the step by step with you today!

Supply List

1.Cereal boxes, cracker boxes, any lightweight bendable cardboard- We specifically used cereal boxes.

2. Scissors

3. Glue- We used Mod Podge.

4. Paint- We used kids washable tempera paint.

5. Hole punch, awl, anything that can poke a hole through the cardboard for hanging- We used an awl.

6. Tissue paper. I hoard these after gift opening lol.

7. Ribbon, string, or yarn for hanging- We used both ribbon and yarn.

Here we go! Weeee!

image
1. I began by opening up the cereal box so that it is flat and then cut the box to the size that I wanted.

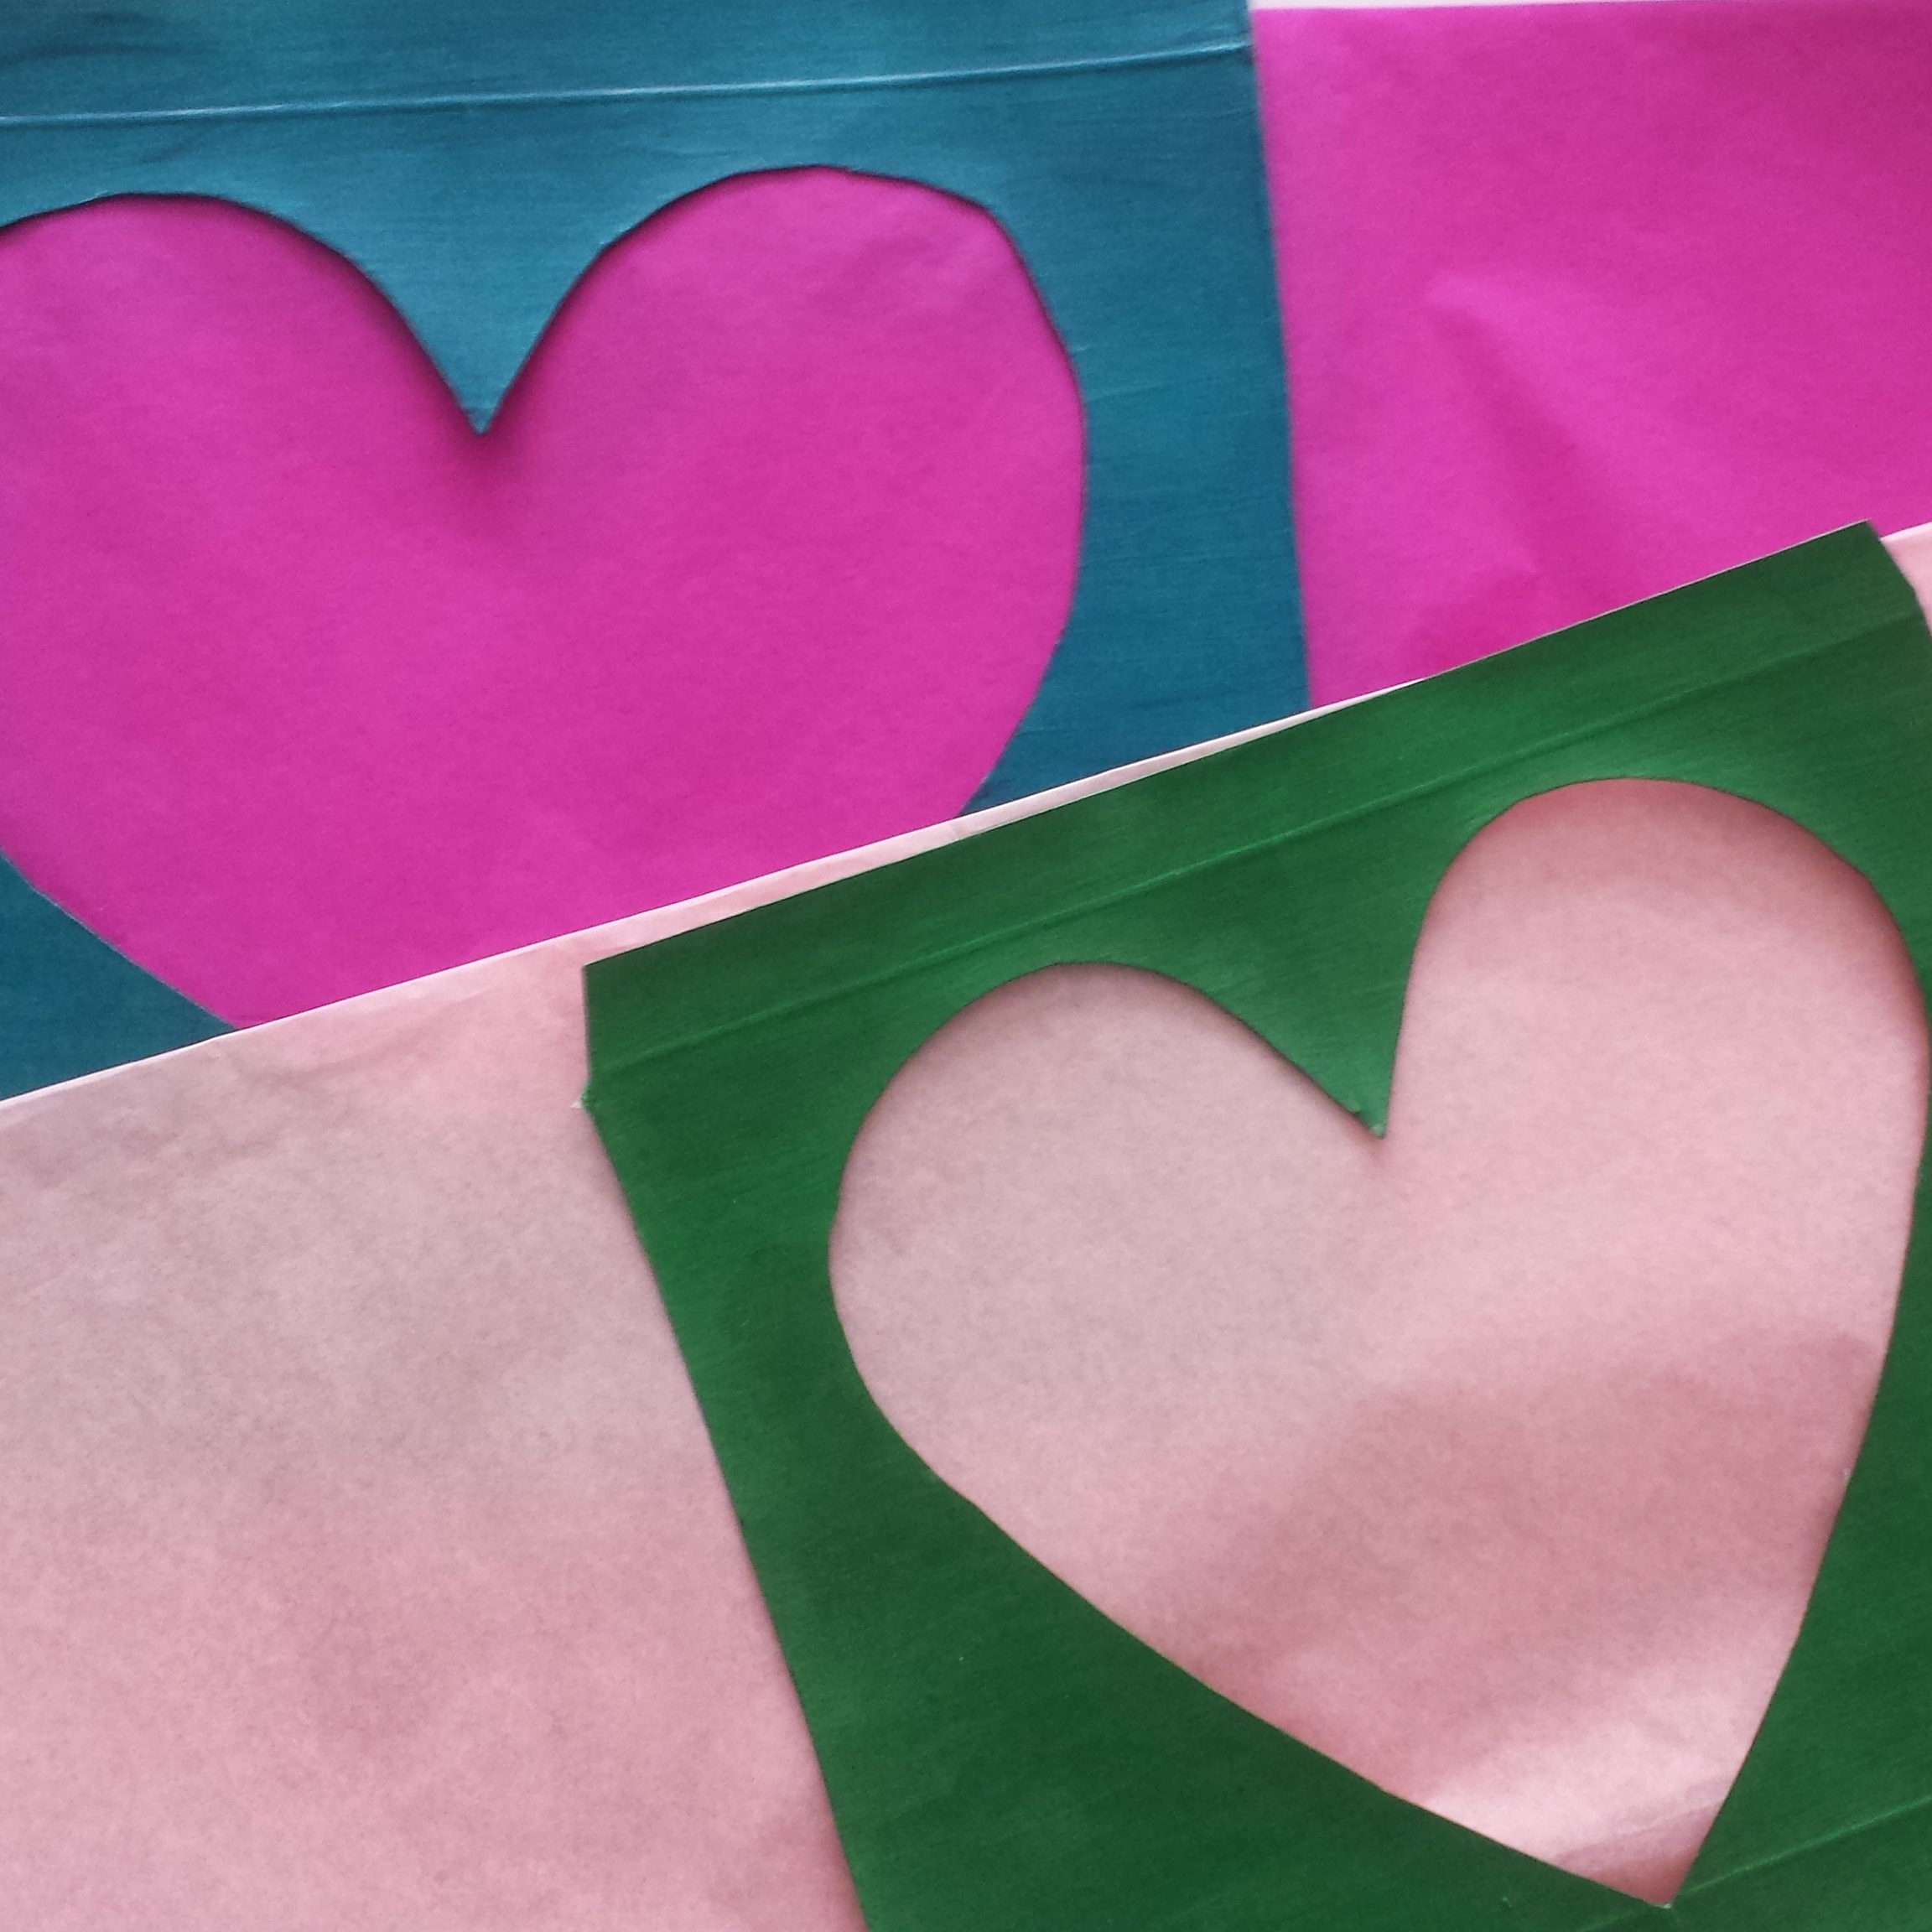
I took a marker to draw a heart onto the box and poked my scissors through the middle to cut it out. I was out of xacto blades so you can use an xacto as well.

Do this with a second box for the back. Facing the printed sides together, trace the heart you just cut out onto the second box so that they line up, cut that baby out as well!


2. Begin painting the cardboard sides of the cereal boxes. We did 2 coats of kids washable tempera paint. Here is my little painter at work.

image
3. This is what it looks like all painted and dry. It looks so pretty as is! But wait…there’s more!


4. Don’t forget about the twin for the back! While one was drying, we painted the other.

image
5. Mod Podge those honeys! To prevent fading from the sun we gave the painted card board a few layers 2-3.

image
6. Pick out some tissue paper and cut to size. Can you see where this is going now?!

image
7. Glue the tissue paper to one heart and slather on more glue to the heart twin. Sandwich together and lay under a heavy book to prevent curling.

image
8. Yarn and ribbon for these cuties!

image
9. Poke some holes for hanging.


Voila! All done. Mother daughter crafting from our home to yours!

Color and shrink woo hoo!

We were at Michaels the other day and my daughter spotted a small set of Valentine’s Day color and shrink sheets. Now when I was a girl I always wanted Shrinky Dinks. Oh how I remember those Saturday morning commercials calling my name! So, when my daughter asked if we could buy them, I joyfully and over excitedly said ABSOLUTELY! The 7 year old in me was over the moon. I may or may not have been jumping up and down as I answered. Here is our step by step with pics!

image

Here is the little kit from Michaels! *The ball chain it came with is not included in the photo.

image

Ready with my tools!….After you color the image you have to cut it out and punch a hole in it for stringing.

image

Isn’t it so wonderfully magical to put these in the oven and watch them transform? It was so fun staring through the oven window with my daughter.

image

The kit came with some ball chains.  Instead, I got some lovely bamboo chord and beeswax to run it through to make a lovely necklace.

image

Voila! Isn’t it lovely?

Mini fairy garden terrariums

Hello! What a wonderful day to create!

In my very first blog post I talked about having the kids make mini fairy garden terrariums as a craft for my daughter’s 6th birthday party. Photos of 2 of those beauties are there. It is surprisingly easy and the children had so much fun.

We made two yesterday as gifts for my daughters teachers. Here is a step-by- step for you to make your own magical goodness!

Supply List:

1. Glass container of your choice. We used mini candle holders. I found Libby glass at Dollar Tree for $1 and Anchor Hocking for 99 cents at Michaels. Both made in the USA, Hooray!

2. Activated charcoal. You can get this at your local pet supply store in the aquarium section. We got ours at PetCo. The charcoal will keep the air in your terrarium clean and prevent microorganisms from growing.

3. River rocks, gardening decor rocks. You can find these in 5lb. bags at Home Depot or Lowes for around $5. I got one there and some smaller bags at Dollar Tree for $1

4. Plants of choice. We used live moss. I purchased ours from Jayson home and garden in Chicago.

5. Magical stones and trinkets for decor.

Let’s begin!

1. Wash your glass container with hot soapy water and dry.

2. Scoop activated charcoal into your bowl.

image

image

3. Add a layer of rocks to ensure proper drainage and help hold water.

image

4. Place your plant on top of rocks. As we are using moss we do not need a layer of soil.

5. Add your magical items and voila! All done!

image

image

I hope you enjoyed this little how to. I certainly enjoyed sharing it with you!

Valentine wall decor

image

Our tools! Before shot.

image

And after!

Supplies:

1. Heart punches- or your own hand cut hearts.

2. Colored paper- we used colored text paper from Paper Source

3. Glue stick

4. Doilies- I got mine from Dollar Tree

5. Scissors

Let’s begin!

1. I had my daughter dab the glue stick onto the doilies over a sheet of paper. The glue goes through all of the cut out portion of the doily so be sure to have something underneath.

2. She pressed the doily onto the colored paper.

3. I then took my scissors and cut about 3/4″ around the doily.

4. She took a few heart cut outs and glued them on!

So simple and pretty! Aren’t the bright colors just darling?!

Valentine’s day crafting begins!

image

image

First we made garlands! Garlands of any kind just add so much joy to any blank space they are hung at don’t they?

Here’s what we used:

1. Heart Punch- you can just cut out your own heart if you don’t have one.

2. Hole punch- use a nail, pencil tip, awl if you don’t have one

3. Twine- any string on hand you have will do.

4. Yarn needle this is helpful if your little one is threading my daughter is 6 and twine frays easily so it makes things easier for small hands

Let’s begin!

1. Punch or cut your hearts out. My daughter loves this!
2. Mark two holes at the top of your heart and use your hole punch (nail, awl etc.)
3. Thread your yarn needle (or wrap a piece of tape to the tip of your string to prevent fraying) let your child string the hearts on.
4. Hang and enjoy!